Scope Definition
The scope of a chained Scenario or Simulation defines which Assets the Chaining Engine is allowed to target, and the operational boundaries (timeout, rate limit) that keep an automated run safe. OpenAEV also exports and imports this scope definition for chained Scenarios and Simulations so teams, players, and other scope targets stay linked across environments. This page details the Scope tab.
What is a scope?
A scope is made of:
- An allow list and a deny list of targets (Assets, Asset groups, or manually entered/CSV-imported IPs, IP subnets, and hostnames). The deny list always takes priority: a target listed in both is excluded.
- Variables: named values you can reuse across your logic (see Variables).
- A timeout: the maximum total runtime for the whole chained run.
- A rate limit: how frequently an Action is allowed to execute — the interval between consecutive executions.
Why use it?
- Prevent unintended blast radius: a chained run can create and trigger many Injects dynamically as conditions resolve; the scope guarantees it never touches Assets outside your allow list.
- Model brute-force or stealthy behavior: the rate limit lets you control how frequently an Action executes, simulating a slow, stealthy attacker instead of one that acts all at once.
- Cap runaway executions: the timeout stops the run automatically if it does not converge (for example, a condition that never resolves).
- Reuse values: Variables let you define a value once (an account name, a shared path) and reference it from multiple Actions — handy to try out a specific value across your simulation, or simply to validate that a value is correct before wiring it into several Actions.
How do I do it?
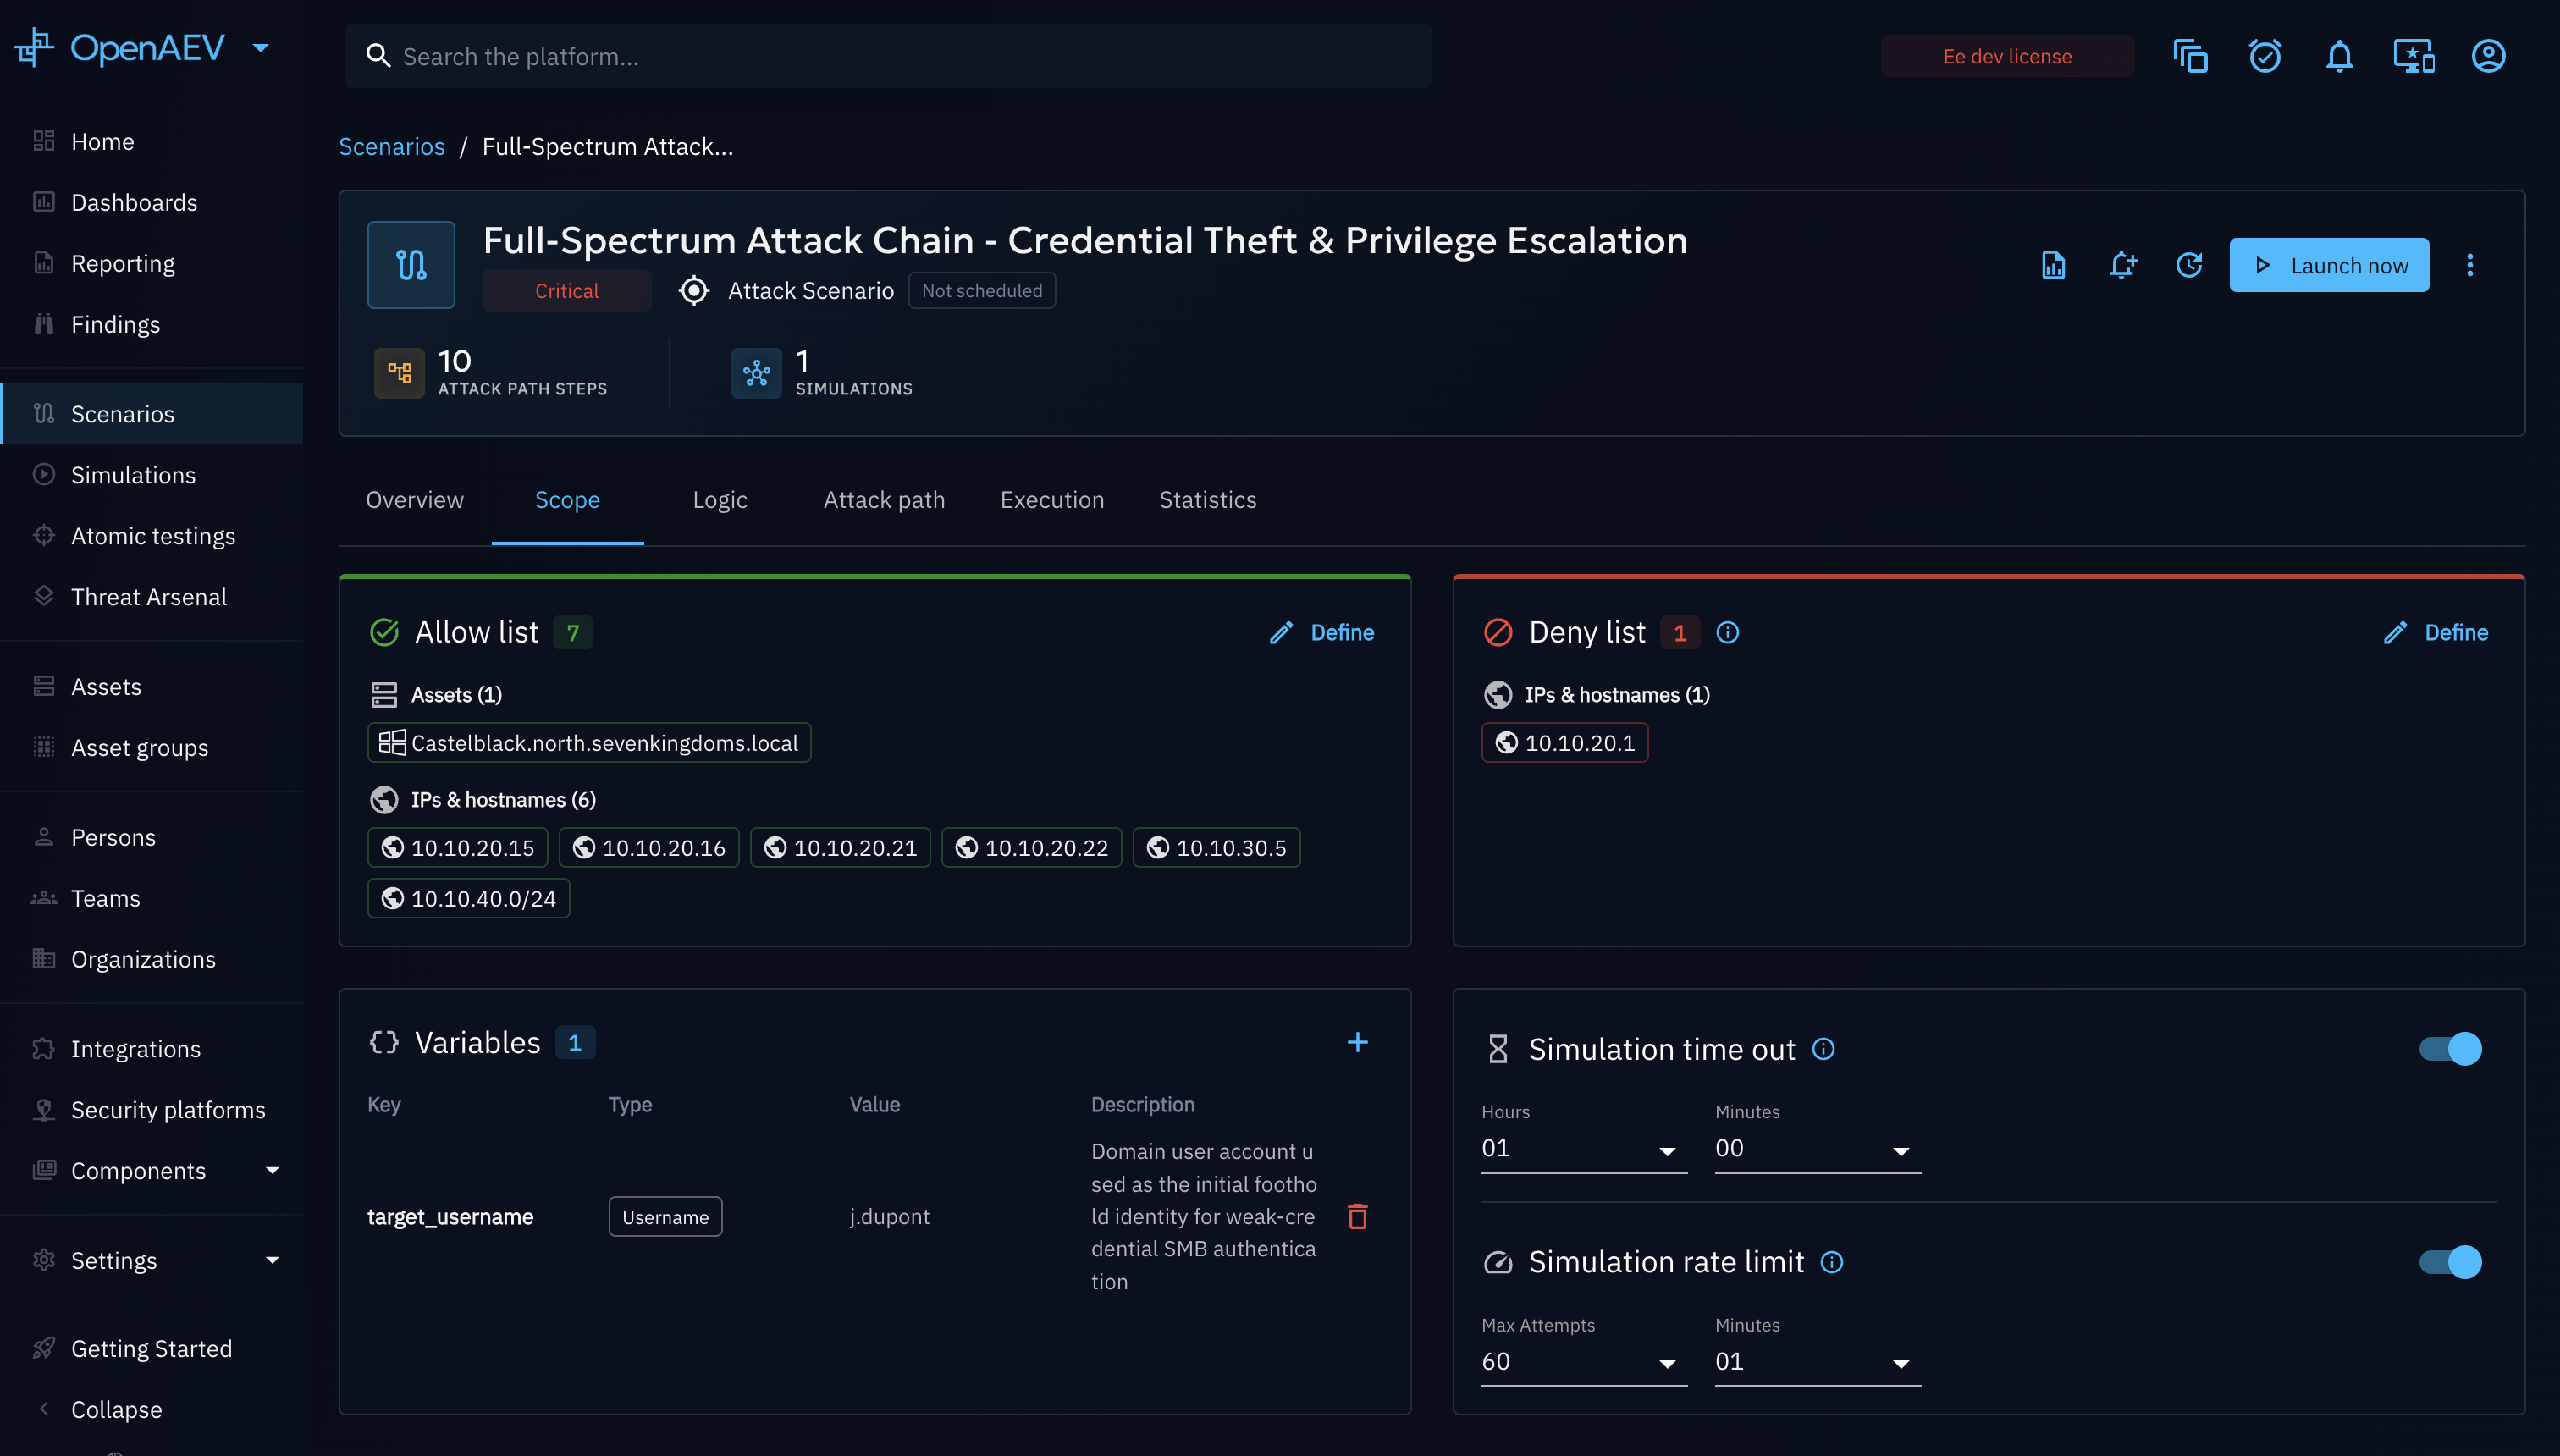
Allow list and deny list
- Open the Scope tab of your chained Scenario or Simulation.
- In the Scope section, click Add on the Allow list column. This opens the Define allowlisted scope drawer.
- In the drawer, select targets from the Assets or Asset groups tabs, or add custom values manually or via
CSV import. Before importing, you can download a CSV template to see the exact
type,valuestructure expected. - Click Define scope to save.
- Repeat for the Deny list if you need to explicitly exclude some targets (for example, a subset of an Asset group added to the allow list). This opens the equivalent Define denylisted scope drawer.
| Rule | Detail |
|---|---|
| Deny vs allow | The deny list always takes priority over the allow list: a target present in both is excluded from execution |
| Sources | Assets, Asset groups, manually entered IPs/IP subnets/hostnames, CSV import |
| CSV import | A two-column type,value file, with domain, ip, or ip_subnet as the accepted types (a header row is detected and skipped automatically). Duplicate rows are removed, and each invalid row is reported individually with the reason (unknown type, malformed domain, invalid IP or subnet) so you can fix and re-import without losing valid entries |
Warning
A chained Scenario or Simulation cannot be launched with an empty scope: the Launch button is disabled and a tooltip explains that a defined scope is required. The platform's health checks also flag an empty scope as a warning, with a shortcut back to this Scope tab.
Variables
Defining Variables is optional; add one only if you need to reuse a value across your logic.
- In the Variables section, click the + icon.
- Provide a key, a type, a value, and an optional description. The type is required: it is how the platform matches Variables to Action inputs.
- Click Create. The value must match its type (for example a valid IP address or port), or the dialog shows an error.
- In the Logic tab, when an Action input has the same type as a Variable, that Variable is available for that input and can be used by linking it instead of typing a static value. If no Action input matches a Variable's type, that Variable stays unused.
Timeout
- In the Simulation time out section, toggle it on.
- Set the maximum duration in hours and minutes. Execution stops automatically once this duration is reached, whatever the state of the run.
If you leave the timeout toggled off, the Chaining Engine still applies a default timeout of one hour (3600 seconds) to every chained run — a run is never allowed to continue indefinitely, even without an explicit setting.
Rate limit
- In the Simulation rate limit section, toggle it on.
- Set the maximum attempts and the time window (in minutes) over which that maximum applies. This defines the interval at which an Action is allowed to execute — useful for simulating brute-force or slow, stealthy attacks.
When enabled without further changes, the rate limit defaults to 1 attempt per 30 minutes — adjust both values to match the behavior you want to model.
Example
You are targeting a subnet of 50 endpoints represented by an Asset group, but two of them are production systems you must never touch:
- Add the Asset group to the allow list — for example, an entire
10.0.4.0/24subnet entered via CSV import as anip_subnetrow. - Add the two production endpoints individually to the deny list: since deny always wins over allow, this carves them out of the subnet you just allowed without having to redefine the allow list.
- Enable the rate limit (5 attempts / 30 minutes) to throttle a credential-spraying Action.
- Enable a timeout of 2 hours so the run cannot exceed your test window.
Once the Simulation has completed, you can generate a custom report of the run from the Simulation's report options, or schedule recurring reporting — the same reporting mechanism available for any Simulation, chained or not.
What's next?
- Logic Creation: build the Actions and Events that will run within this scope.
- Attack Path Map: see which of your allowed Assets were actually reached.
- Attack Chaining overview: back to the feature hub.